
 by
by In this part we would be able to display an edit modal form. Then the user could make some changes and save. Previously, in Part 2, we added a modal form for adding new record. What we used then is called Template-Driven form. Now, for editing, we would use Reactive form. Reactive form is more feature rich than template-driven form. In this part, we would cover the following
1. Setup the Edit Modal
Follow these simple steps below:
Step 1: Copy and duplicate the template modal for ‘Add New’
Step 2: Change the id of the ng-template from #content to #contentEdit
Step 3: Remove all the id attributes of the inputs. They are not mandatory here. But if you choose to leave them, then you must give them unique values.
Step 4: Modify any other conflicting id
Step 5: Remove all the ngModel attribute
Step 6: Change all the name attribute to formControlName
Step 7: Change the form markup, adding formGroup attribute. Like so
<form [formGroup]="editForm" novalidate>
If you get it all right, then the final markup would be as shown
<form [formGroup]="editForm" novalidate>
  <div class="form-group">
   <label for="id">Id</label>
   <div class="input-group">
      <input formControlName="id" class="form-control">
   </div>
 </div>
  <div class="form-group">
    <label for="firstname">Firstname</label>
    <div class="input-group">
      <input formControlName="firstname" class="form-control">
    </div>
  </div>
  <div class="form-group">
    <label for="lastname">Lastname</label>
    <div class="input-group">
      <input formControlName="lastname" class="form-control">
    </div>
  </div>
  <div class="form-group">
    <label for="department">Department</label>
    <div class="input-group">
      <input formControlName="department" class="form-control">
    </div>
  </div>
  <div class="form-group">
    <label for="email">Email</label>
    <div class="input-group">
      <input formControlName="email" class="form-control">
    </div>
  </div>
  <div class="form-group">
    <label for="country">Country</label>
    <div class="input-group">
      <input formControlName="country" class="form-control">
    </div>
  </div>
  <div class="border text-center"> <button data-dismiss="modal" class="btn btn-info">Save Changes</button> </div>
</form>
2. Setup the Form Submission
Now, if you look at the ‘editForm’ value at the form tag, you’ll notice an error.
Step 1: To fix this, open the TypeScript file and create the editForm field. It would be of type FormGroup.
Step 2: Add an event to the edit Button on the table to open the edit modal form.
(click)="openEdit(contentEdit, friend)"
Step 3: We would now build our Reactive form. To do that, add a parameter to the constructor of type FormBuilder
Step 4: In the ngOnInit() method, you’ll build the form. This means that you’ll specify the controls that make up the form. Here’s the codes to do that below. Add this code to the ngOnInit() just below this.getFriends() statement.
ngOnInit(): void {
  this.getFriends();
  this.editForm = this.fb.group({
    id: [''],
    firstname: [''],
    lastname: [''],
    department: [''],
    email: [''],
    country: ['']
  } );
}
3. The openEdit() Function
This is the function that would execute when the user selects a record using the Edit button. To set it up
Step 1: Begin by copying the function for the openDetails() and change the name to openEdit()
Step 2: Delete all the document.getElementById() lines
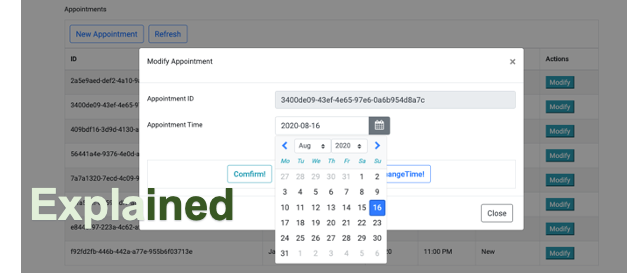
At this point, you can launch the application and click on the Edit button. You will see the screen below:

Now, let’s write the code to load the controls with data. You will do this using the patchValue() method of the form
Step 3: Add the code below in the same openEdit() function that you was used to open the form. So the complete openEdit() function is as shown below:
openEdit(targetModal, friend: Friend) {
  this.modalService.open(targetModal, {
    backdrop: 'static',
    size: 'lg'
  });
  this.editForm.patchValue( {
    id: friend.id,
    firstname: friend.firstname,
    lastname: friend.lastname,
    department: friend.department,
    email: friend.email,
    country: friend.country
  });
}
If you’ve come this far, then congrats to you! Since the next part would involve taking a look at the API endpoint, I’ll like to treat it separately. So let’s move on to the next part. Remember to subscribe to my YouTube Channel for the video lessons.

[…] Part 5 – Editing and Updating (PUT Request) […]
Hey,
Your Tutorial is really helpful. Thanks alot.
But I am getting an error the edit section as: Can’t bind to ‘formGroup’ since it isn’t a known property of ‘form’.
I have also imported ReactiveFormsModule. But Its still not Happening for me!
Please Help!!